Drawing:9qs9xgbv4jo= skeleton is an essential skill for any aspiring artist, whether you’re interested in realism, fantasy art, or character design. Skeletons serve as the foundational structure for all vertebrate creatures, and understanding how to draw them can enhance your ability to create lifelike and dynamic figures.
In this guide, we’ll explore techniques, tools, and tips for drawing skeletons accurately, while also delving into the significance of skeletal anatomy in art. Whether you’re a beginner or a seasoned artist, this comprehensive guide will help you hone your skills and expand your creative horizons.
Understanding the Importance of Skeletal Anatomy
Before you start drawing skeletons, it’s important to understand why skeletal anatomy matters in art. Skeletons provide the underlying framework for muscles, skin, and other anatomical features. They determine the proportions and movements of a figure, making them crucial for creating realistic and believable art. Here are some reasons why mastering skeletal anatomy is beneficial:
- Improved Proportions: Understanding the skeletal structure helps artists achieve accurate proportions in their drawings:9qs9xgbv4jo= skeleton. The placement and size of bones dictate the length and shape of limbs, the width of the torso, and the position of joints.
- Dynamic Poses: Knowing how bones articulate and move allows artists to create dynamic poses and gestures. This knowledge is particularly useful for drawing action scenes, animations, and character designs that require movement.
- Consistency Across Styles: Whether you prefer realism, cartooning, or fantasy art, a solid grasp of skeletal anatomy provides a consistent foundation for your work. Artists can manipulate or exaggerate skeletal elements to suit their style while maintaining a sense of realism.
- Enhancing Detail: Skeletons add depth and detail to your artwork. When you understand the structure beneath the surface, you can depict muscles, skin, and clothing more convincingly.
Essential Tools for Drawing:9qs9xgbv4jo= skeleton
To begin your journey in drawing skeletons, you’ll need some essential tools. While digital art software offers numerous advantages, traditional mediums also provide valuable learning experiences. Here are some tools you can use:
Traditional Tools
- Pencils: Graphite pencils ranging from 2H to 6B allow for a variety of line weights and shading techniques.
- Erasers: Kneaded erasers work well for lifting graphite without damaging the paper.
- Paper: Choose a smooth paper with a medium weight to handle detailed sketches and shading.
- Rulers and Compasses: These tools assist in measuring proportions and creating accurate angles.
Digital Tools
- Graphics Tablet: A tablet with pressure sensitivity offers precision and control when drawing digitally.
- Drawing Software: Programs like Adobe Photoshop, Corel Painter, and Clip Studio Paint offer advanced tools for digital artists.
- Reference Images: Collect reference images of skeletons from books, online databases, and anatomy websites to guide your work.
Step-by-Step Guide to Drawing Skeletons
Now that you understand the importance of skeletal anatomy and have your tools ready, let’s dive into the process of drawing:9qs9xgbv4jo= skeleton. We’ll break down the process into manageable steps to help you create accurate and detailed skeletal drawings.
Step 1: Study Skeletal Anatomy
Begin by studying the basic anatomy of a skeleton. Familiarize yourself with the major bones, their names, and their locations. Focus on understanding the proportions and relationships between different skeletal elements.
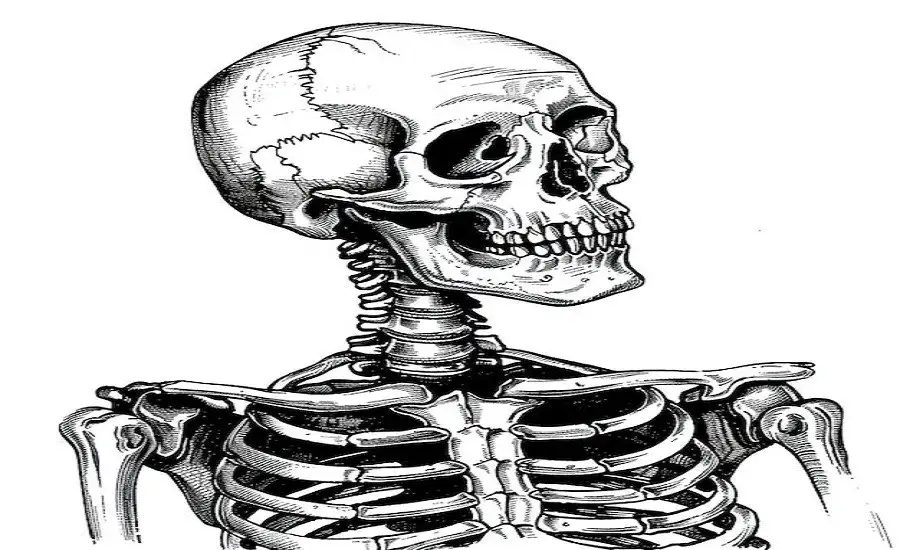
- Skull: The skull consists of several bones, including the frontal bone, parietal bones, and mandible (jawbone). Pay attention to the shape and size of the skull as it varies across species.
- Spine: The spine is composed of vertebrae and serves as the central support structure. Note the curves of the spine and the alignment of the vertebrae.
- Ribcage: The ribcage protects vital organs and consists of ribs connected to the sternum and thoracic vertebrae.
- Pelvis: The pelvis connects the spine to the lower limbs and varies in shape between males and females.
- Limbs: Study the bones of the arms and legs, including the humerus, radius, ulna, femur, tibia, and fibula. Note how these bones connect at joints like the shoulder, elbow, hip, and knee.
Step 2: Create a Basic Skeleton Outline
Start by sketching a basic outline of the skeleton. Use light lines to establish the proportions and positions of the major bones. Begin with the skull, then move down to the spine, ribcage, and pelvis. Finally, sketch the limbs, paying attention to the alignment of the joints.
- Proportions: Ensure that the head is proportional to the body. A common guideline is that the average human skeleton is about 7.5 to 8 heads tall.
- Center Line: Draw a center line down the spine to maintain balance and symmetry in your drawing:9qs9xgbv4jo= skeleton.
- Joints: Mark the positions of major joints, such as the shoulders, elbows, hips, and knees. This will help you place the bones accurately.
Step 3: Add Details and Refinements
Once you have the basic outline, begin adding details to the skeleton. Refine the shapes of the bones and add any anatomical landmarks. Pay attention to the contours and angles of each bone to create a realistic depiction.
- Skull Details: Define the eye sockets, nasal cavity, and jawline. Add any unique features, such as the zygomatic arch (cheekbone) and the mandible’s hinge.
- Spinal Curvature: Emphasize the natural curvature of the spine, including the cervical, thoracic, lumbar, and sacral regions.
- Ribcage Shape: Outline the ribs and sternum, showing how they curve around the chest cavity.
- Pelvic Structure: Add details to the pelvic bones, highlighting the ilium, ischium, and pubis.
- Limb Bones: Refine the shapes of the arm and leg bones, emphasizing the rounded ends of long bones where they form joints.
Step 4: Shading and Texture
Shading and texture add depth and realism to your skeletal drawing. Use various shading techniques to create shadows and highlights, giving the bones a three-dimensional appearance.
- Hatching and Cross-Hatching: Use parallel and intersecting lines to build up shadows and create texture.
- Blending: Use blending stumps or your fingers to smooth out shading and create gradual transitions.
- Highlights: Leave areas of the paper untouched to represent highlights on the bones, suggesting reflective surfaces.
Step 5: Practice Different Perspectives
Practice drawing skeletons from different angles and perspectives. This exercise will enhance your understanding of how skeletal structures appear in various poses and viewpoints.
- Foreshortening: Practice foreshortening to depict bones that extend toward or away from the viewer. This technique adds depth and realism to your drawings.
- Dynamic Poses: Experiment with drawing skeletons in dynamic poses, such as running, jumping, or reaching. Use reference images to capture accurate motion.
Tips for Successful Skeleton Drawing
- Use References: Always have reference images on hand to guide your work. Anatomy books, online resources, and 3D models provide valuable insights.
- Study Real Skeletons: If possible, visit a museum or anatomy lab to observe real skeletons. Studying real-life specimens helps you understand the intricacies of bone structure.
- Practice Regularly: Consistent practice is key to improving your skills. Set aside time each day to draw skeletons and refine your techniques.
- Seek Feedback: Share your work with fellow artists and seek constructive feedback. Join online art communities and participate in critiques to gain new perspectives.
Applications of Skeletal Drawing
Drawing:9qs9xgbv4jo= skeleton has numerous applications beyond traditional art. Here are some fields where skeletal drawing plays a crucial role:
Character Design
Character designers in animation, video games, and film use skeletal anatomy to create believable characters. Understanding how skeletons work helps designers create characters that move naturally and convincingly.
Medical Illustration
Medical illustrators use skeletal anatomy to create accurate and informative illustrations for textbooks, research papers, and educational materials. These illustrations aid in teaching anatomy and medical procedures.
Paleontology
Paleontologists study fossilized remains to reconstruct the skeletons of extinct species. Artists working in this field create detailed illustrations of dinosaurs and other prehistoric creatures based on fossil evidence.
Forensic Art
Forensic artists use skeletal anatomy to assist in identifying human remains. By reconstructing facial features from skulls, forensic artists help law enforcement solve cases of missing persons and identify victims.

Advanced Techniques and Exercises
Once you’ve mastered the basics of drawing skeletons, it’s time to delve into more advanced techniques and exercises. These will help you develop a deeper understanding of skeletal anatomy and improve your skills in creating dynamic, lifelike figures.
Advanced Techniques
1. Simplifying Complex Structures
While studying each bone is crucial, you also need to learn how to simplify these structures for quicker sketches. Understanding how to break down complex shapes into simple forms can speed up your workflow and enhance your ability to capture dynamic poses quickly.
- Use Basic Shapes: Start by using basic shapes like cylinders, spheres, and cubes to represent different parts of the skeleton. For example, use a cylinder for long bones like the femur and a sphere for joints like the shoulder.
- Gesture Drawing: Practice quick gesture drawings to capture the essence of a pose without focusing on details. This technique helps you understand the flow and movement of the skeleton.
2. Studying Joint Mechanics
Understanding how joints work will enable you to create more realistic and expressive poses. Focus on the range of motion and limitations of each joint.
- Ball-and-Socket Joints: These joints, found in the shoulders and hips, allow for a wide range of motion. Study how these joints rotate and how they affect the attached limbs.
- Hinge Joints: Hinge joints, like the elbows and knees, primarily move in one plane. Understanding their movement can help you accurately depict bending limbs.
- Pivot Joints: Found in the neck and forearm, pivot joints allow for rotational movement. Observe how these joints function and how they contribute to overall movement.
3. Incorporating Muscles
While the focus is on skeletons, understanding how muscles overlay the bones can enhance your drawings. Muscles impact the overall shape and form of the body.
- Identify Muscle Groups: Learn the major muscle groups and their attachments to the skeleton. This knowledge will help you depict how muscles influence posture and movement.
- Study Muscle Contractions: Observe how muscles contract and relax during different actions. This study will help you create more dynamic and realistic poses.
Exercises for Mastery
1. Life Drawing Sessions
Participate in life drawing sessions where you can observe and sketch live models. These sessions will improve your ability to capture the human form quickly and accurately.
- Timed Sketches: Practice quick sketches with time constraints to improve your speed and accuracy. Start with 30-second poses and gradually increase the duration.
- Focus on Different Angles: Draw the model from various angles to enhance your understanding of perspective and anatomy.
2. Skeleton Studies from Photos
Use photographs of skeletons as reference material for detailed studies. These exercises will help you refine your technique and deepen your anatomical knowledge.
- Highlight Key Structures: Choose specific areas to focus on, such as the skull or hands, and study them in detail. Highlight the shapes and contours to improve your understanding.
- Analyze Movement: Use photos of skeletons in different poses to analyze movement and articulation. This exercise will help you understand how bones interact during motion.
3. Sculpting Skeleton Models
If you have access to sculpting materials, try creating a 3D model of a skeleton. Sculpting provides a hands-on approach to understanding anatomy and proportions.
- Use Clay or Digital Tools: Whether using clay or digital sculpting software, creating a 3D model will give you a new perspective on skeletal structure.
- Focus on Proportions: Ensure that your model is proportional and anatomically accurate. This exercise will reinforce your understanding of the relationships between different bones.
Common Mistakes and How to Avoid Them
Even experienced artists can make mistakes when drawing skeletons. Here are some common pitfalls and tips on how to avoid them:
1. Ignoring Proportions
One of the most common mistakes is neglecting proportions. Inaccurate proportions can lead to awkward and unrealistic drawings:9qs9xgbv4jo= skeleton.
- Measure Carefully: Use measurement techniques, such as comparing the size of the head to the body, to ensure accurate proportions.
- Use Guidelines: Draw guidelines to help maintain symmetry and alignment in your work.
2. Overcomplicating Details
Focusing too much on details can overwhelm your drawing and detract from the overall composition.
- Simplify Forms: Break down complex structures into simple shapes and focus on capturing the essence of the pose.
- Balance Detail and Simplicity: Strive for a balance between detail and simplicity, ensuring that your drawing remains clear and readable.
3. Neglecting Joint Mechanics
Failing to understand how joints work can result in stiff and unrealistic poses.
- Study Joint Movement: Observe real-life movements and study joint mechanics to improve your understanding.
- Practice Dynamic Poses: Experiment with dynamic poses to challenge your knowledge of joint articulation.
4. Overusing Erasers
While erasers are valuable tools, overusing them can damage your paper and muddy your drawing.
- Draw Lightly: Use light lines initially, allowing you to make adjustments without heavy erasing.
- Embrace Mistakes: Learn from mistakes and use them as opportunities to improve your skills. Avoid striving for perfection in every line.
Conclusion
Drawing skeletons is a rewarding endeavor that can significantly enhance your artistic abilities. By understanding skeletal anatomy, practicing regularly, and embracing challenges, you can create lifelike and dynamic figures in your art. Remember to study real skeletons, seek feedback, and continually push the boundaries of your creativity.
Whether you’re interested in character design, or medical illustration, or simply want to improve your drawing skills, mastering the art of drawing:9qs9xgbv4jo= skeleton will serve as a strong foundation for your artistic journey. Keep practicing, stay curious, and enjoy the endless possibilities that skeletal anatomy offers to your creative pursuits.
[…] ahead, the future of cats in art seems as boundless as ever. As new artistic movements and technologies emerge, cats will undoubtedly continue to inspire creators across the […]